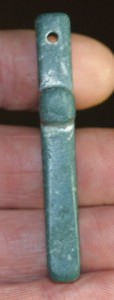
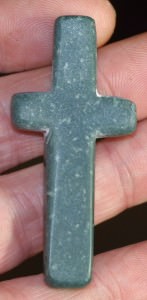
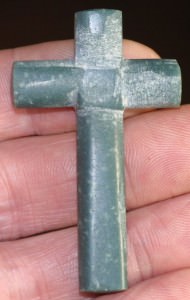
Seems I made a mistake when I decsribed these as crucifixes, I have been informed that a crucifix has the figure of Jesus on the cross, sorry about that, I will now describe these peices as crosses.
We recently had a request from a lady who wanted a cross made from rose quartz, fortunately there is no rush for this item as we need to figure out how to make these, good job as we needed to teach oursleves how to do it.
This post is about the initial learning phase of making these cross shapes and the problems we faced and how we resolved those problems.
We selected green Aventurine as we have plenty of this in our rough rock store.
So the first job was to cut some slabs on the slab saw which was easy enough, then we marked out the cross outline with an aluminium scribe, again easy enough!
Now we returned to the slab saw to cut out the cross shape, this is where we hit two problems, the first was that it was difficult to see the scribed lines because of the saw oil, the second, and we hadn’t realised this. We found that if we cut right up to the scribed line and then reversed the stone the cut actually extended beyond where we wanted it, this is because of the circumference of the saw blade.
Time for a cup of tea and a bit of think about these problems, during our discussions we remembered the small diamond cut off wheels we had bought an age ago but had never used. So we fitted one onto a mandrel and then onto out Foredom flex shaft drill. Eureka, this sorted out the problems, first of all because water is used as the coolant on these wheels so no problem seeing the scribed lines and also it was much easier to make the cuts simply by cutting close to the line and then reversing the stone and continuing the cut from that side. Se finally got a couple of cross shapes!
The next step was to drill a hole of about 2mm through the top of the cross so a leather thing could be threaded through. I find it’s better to do the drilling at this stage rather than drilling a finished polished item simply because any marks or scratched that might be caused by the drilling process or holding the item in a vice can be ground out at later stages.
So we drilled a pilot hole of 1mm with a triple ripple diamond bit, then opened it using 1.5mm and 2mm diamond twist drill bits, no problems there, just the time involved, it takes an age to drill holes in rock.

Then we moved onto the cab machine, but only got as far as the roughest wheel and then ran out of time.

We will continue this post when we have made further progress on these 2 cross preforms.

Best regards
Dave