Our Rock Tumbling Process
 Recently I shot a series of four short videos documenting a snippet in time of our rock tumbling process. Reason I say snippet in time is that we do our weekly check on the tumbling on a Monday and this was when I shot the videos.
Rock Tumbling Process – Video 1
The first video shows us opening up the barrels after they have been tumbling for a week, there is one x 220 grit load and 2 x 80 grit loads to look at. We start by opening up the barrels, starting with the 220 grit barrel. We always start off with the finest grit barrel, or if we have a polish barrel that would be first. Why, because if our hands become contaminated with the grit or polish, it doesn’t matter if the next barrels we touch are a coarser grit as it will have no effect.
You will notice we have both large and small stones in the barrels. The reason for this is that the smaller stones help the grit to get into all the nooks in the larger stones.
Thorough Cleaning is Essential
So far we have only rinsed the stones and barrels into a bucket, next we will give them a thorough wash outside under running water. Let me tell you why we do this outside rather than in the kitchen sink. The reason is that the sludge from the barrels will block up the plumbing in the house. Now the stones and barrels are washed, we fill a bucket with warm soapy water and give the barrels, rubber O rings and inner seals a good clean up.
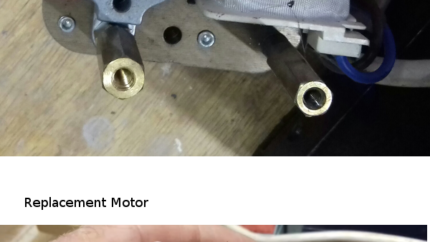
During this part of the process I always do a visual check of the inner seal, you can read more about this on this post here: Checking and repairing the Rubber Barrel inner seal.
Grading the Stones – Video 2
The next job in our rock tumbling process is to take a good look at all of the stones. So the first thing is to let the stones dry out. You may be wondering why we do this, well I find it easier to see pits and other bad stuff when the stones are dry. When they are wet, they are shiny and it’s harder to see the problems. Also use your sense of touch to feel for cracks and other problems on the stones.
So now we know what we are looking and feeling for, we need to place each stone into the right barrel. If the stone looks and feels to be problem free it can go onto the next finer stage. If it still has problems it can go back into the stage it’s just completed, or go right back to the start! Some stones can get damaged, even in the 400 grit stage and end up going right back to the 80 grit stage.
Some stones have such deep pits or cracks that you will never grind them out, or if you did you would end up with little or no stone left. So providing that the rest of the stone is smooth and that you are sure there is no residual grit left, the stone can move onto the next finer grit.
One final thing to mention, we use what we call “sacrificial stones”. These are stones that are so pitted or messed up that they will never get to the polish stage. We use them to “bulk” up a load if we need to.
Loading the Barrels – Video 3
The next stage in the rock tumbling process is to load up the barrels again with stones, grit or polish and water. In this short video we look at loading up a 400 grit barrel with rocks that have successfully completed the 220 grit stage. We fill the barrel with stones to just below the ledge and then add the grit. One teaspoon for a 1.5lb barrel and 2 teaspoons for a 3lb barrel, being careful not to get any on the ledge when placing it in the barrel.
Next we fill the barrel with water, again to just below the ledge and covering the stones in the barrel. At this stage have a look to ensure that the ledge in the barrel is clean as this will form a seal with the inner seal lid when it’s fitted. Fit the inner seal and make sure it sits right on the ledge and then apply Vaseline to the rubber O ring and fit it.
Always keep some Paper Towel close by
I would suggest at this point that you wipe your fingers on some paper towel to get rid of the residual Vaseline. Because you will have to tighten a small nut next with your fingers, the Vaseline would prevent you from doing this.
Finally the barrel a shake, invert it and keep an eye out for any leaks, if there are none you are good to go!
A quick word about the barrels, we prefer rubber barrels over the plastic barrels for two reasons. One the rubber barrels are a lot quieter than the plastic barrels when they are running. Second, it’s much easier to get a good seal on a rubber barrel than it is on a plastic one. So, although the rubber barrels are a lot more expensive, they do offer considerable advantages.
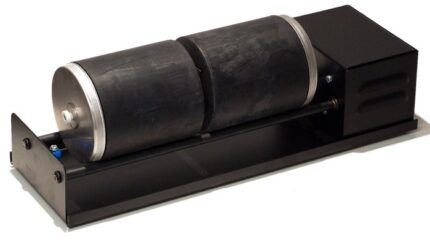
Barrels onto the Tumbling machines – Video 4
The final part of the rock tumbling process for this session is to place the barrels onto the tumbling machines and set them running. In this video we place one barrel on each machine initially and set the machines running. Next you will see how we oil the bearings and then place the remaining barrels onto the machines. Finally there is a short discussion on the monthly cleaning routine for the machines. You can learn more about this cleaning process in this post: Cleaning the CR2 bearings and shafts
This video is available on our Youtube channel
So there you have it, an insight into our weekly rock tumbling process. I hope you have found it informative and if you have any question please leave a comment.